If you have mass quantities of similar content (any sort of catalog of data like resource pages, events, employees, etc.,) and don’t want to manually create and maintain content pages for each entry, a HubDB and a Dynamic Page Template could be a great solution for you.
This solution has some advantages over using a module to display HubDB data…
- You don’t need to create or maintain individual content pages.
- Each HubDB record can have its own page, and that page is dynamically created for you by HubSpot and has a unique, SEO friendly URL and page analytics.
- You can also easily have a summary or listing page with your dynamic data.
The HubDB Source
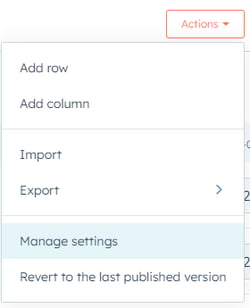 You are able to adapt and use any HubDB table as a source for dynamic pages. Make sure that the HubDB table has enough fields to display content on the detail page, because you cannot add unique content to the detail pages using the CMS page editor. If you’re looking for more details on creating and populating the HubDB, please see our blog post Creating a HubDB. To enable a HubDB as a dynamic page source, go to the Manage Settings option under the HubDB table’s Actions menu and check the “Enable creation of dynamic pages using row data” option. This will do three things:
- Allow the HubDB to be selected as a dynamic data source on a page.
- Add a Page Title and a Page Path field to the table’s columns.
- Enable a few meta data options in the Manage Settings screen.
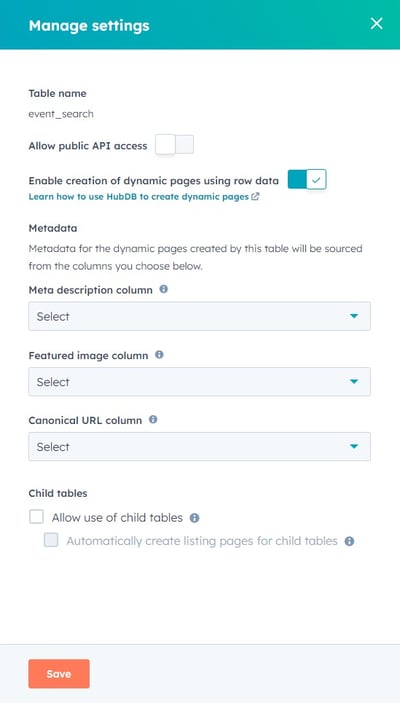 These two new columns allow HubSpot to build the dynamic pages, and the optional meta data fields allow you some additional customization of meta data on the dynamic pages.
- Page Title: this field allows you to have a page title for the dynamic page. This is analogous to the Page Title field in a page; it’s automatically used to create the Title HTML tag and the Title meta tag.
- Page Path: this field allows you to designate a unique page slug for your dynamic page. Just like a blog post, the dynamic pages will use the parent page’s URL as a root, with the page slug added as an additional subdirectory path.
The meta tag options are a bit different; they aren’t new fields HubSpot adds for you; rather you designate their values using the columns already in the HubDB table. These designations are optional:
- Meta Description column: allows you to specify a text field that will populate the detail page’s Meta Description tag. If left undefined, the detail’s description meta tag will be left blank.
- Featured Image column: allows you to designate the featured image of the dynamic page. The field must be of type Image. If undefined, the page will not have a Featured Image meta tag
- Canonical URL column: Allows you to select a URL field with a Canonical URL field. This can be useful if you want to have the same HubDB used to generate multiple dynamic pages and need to designate a canon page. This field must be a URL type, and should be a fully qualified URL. If undefined, HubSpot will use the page’s generated URL (root page’s domain and page slug with the HubDB record’s Page Path).
When you make the HubDB changes, don’t forget to click the Publish button to save your changes.
Building the Template
With the HubDB columns created and data in the table, you’re ready to create the page template. The same template is used to display not only the root listing/search page and the detail pages built from the individual HubDB rows. Keep in mind that while the template is intended to display the HubDB data, you may also have other HubSpot modules on the page to display “static” data. But, the same data will be displayed on both the primary listing as well as the dynamic HubDB pages. The template protocols will work with any HTML/HubL template, including those built into a theme.
Create the template using the Design Manager or your CLI tools; there isn’t anything inherently special with the creation of the template itself.
But, once the template has been created, you will have some unique HubL code on the page to display both the listing content as well as the detail content. The template will need to have both sets of code on it, since HubSpot uses the same template for both the listing and the detail page (you can’t designate a listing and detail template like you can with the Blog system).
Listing Page Content
The listing page will use a special HubDB template variable dynamic_page_hubdb_table_id to determine if you’re on the listing page. From there, you will still need to use the hubdb_table_rows function to retrieve your HubDB content. You may place filters directly on the function call or use the selectattr HubSpot filter to narrow the data you pulled from the HubDB table. For more information on the hubdb_table_rows function, please see our blog post Display a HubDB in a Module.
Once you have the index data, you’re ready to output, you will simply output the data using a HubL for loop. The hubdb_table_rows function works like any other function in HubL; a variable to store the data retrieved belongs on the left side of the equal sign. This variable will store an array of the rows returned by the hubdb_table_rows function. You are able to use a HubL for loop to iterate through the rows and display the retrieved data.
Keep in mind that you aren’t displaying all of the data in the HubDB row record, just enough to differentiate one record from another. Users will be able to go to the detail page and see the rest of the data. The tricky part is building that URL to the dynamic detail page. You will use the special Page Path variable HubSpot added to the table, but you’ll also want to have the current page’s URL prefixed to make it unambiguous. For that, using the request.path variable will give you the URL of the current page.
{% if dynamic_page_hubdb_table_id %}
{% set events = hubdb_table_rows(<the ID number of the HubDB database>) %}
    <div class="event_results">
    {% for event in events %}
    <div class="event_results_event">
      <a href="{{ request.path }}/{{ event.hs_path }}"><h3>{{ event.name }}</h3></a>
      <div>{{ event.location_city }}, {{ event.location_state }}</div>
      <div>{{ event.from_date|format_datetime('short') }} -
           {{ event.to_date|format_time('short') }}</div>
    </div>
    {% endfor %}
    </div>
{% endif %}
The critical lines:
- Line 1 will qualify if the current page being displayed is the listing page.
- Line 2 is the hubdb_table_rows call.
- Line 4 is the start of the for loop. Each iteration will have one row of the HubDB table, and you will use the HubDB table column’s Column name for output.
- Line 6 builds the link to the dynamic detail page. It uses both the page level request.path variable, but also the hs_path HubDB record variable. These together create the URL to the dynamic page.
Feel free to add additional formatting and styles to make this look like you want it to (a vertical list, and horizontal card grid, etc.)
Detail Page Content
The detail page will use a special HubDB template variable dynamic_page_hubdb_row to determine if you’re on one of the detail pages. If you are, you will use the same dynamic_page_hubdb_row variable as if it were a structure that contains the specific row from the HubDB table. Since you’re on the detail page display, you will not have multiple records to display; just the one record for this page.
This page will display all/as many of the details you want to display for the HubDB record. Since this is a page, any HubSpot content modules outside of the specific HubDB row content will still be displayed. But, they will be either above or below your dynamic data.
{% if dynamic_page_hubdb_row %}
    <h1>{{ dynamic_page_hubdb_row.name }}</h1>
    <div>{{ dynamic_page_hubdb_row.from_date|format_datetime('short') }} -
         {{ dynamic_page_hubdb_row.to_date|format_time('short') }}</div>
    <div>{{ dynamic_page_hubdb_row.location_name }} -
{{ dynamic_page_hubdb_row.location_city }},
{{ dynamic_page_hubdb_row.location_state }}</div>
<div>{{ dynamic_page_hubdb_row.event_description }}</div>
{% endif %}
Again, you should have additional styling and display elements to make the records look like a full-fledged content page.
The three meta tag variables designated in the HubDB table Settings add an additional wrinkle to the template output. Rather than use the standard content prefixed variables, you should use a new prefix page_meta.
- "content.meta_description" becomes "page_meta.meta_description"
- "content. featured_image_URL" becomes "page_meta.featured_image_URL"
- And "content.canonical_url" becomes "page_meta. canonical_url"
These page_meta variables will only exist if you opted to designate a field for one of these variables, and if the HubDB row actually has a value. Think of these as an override variable.
Creating a Page
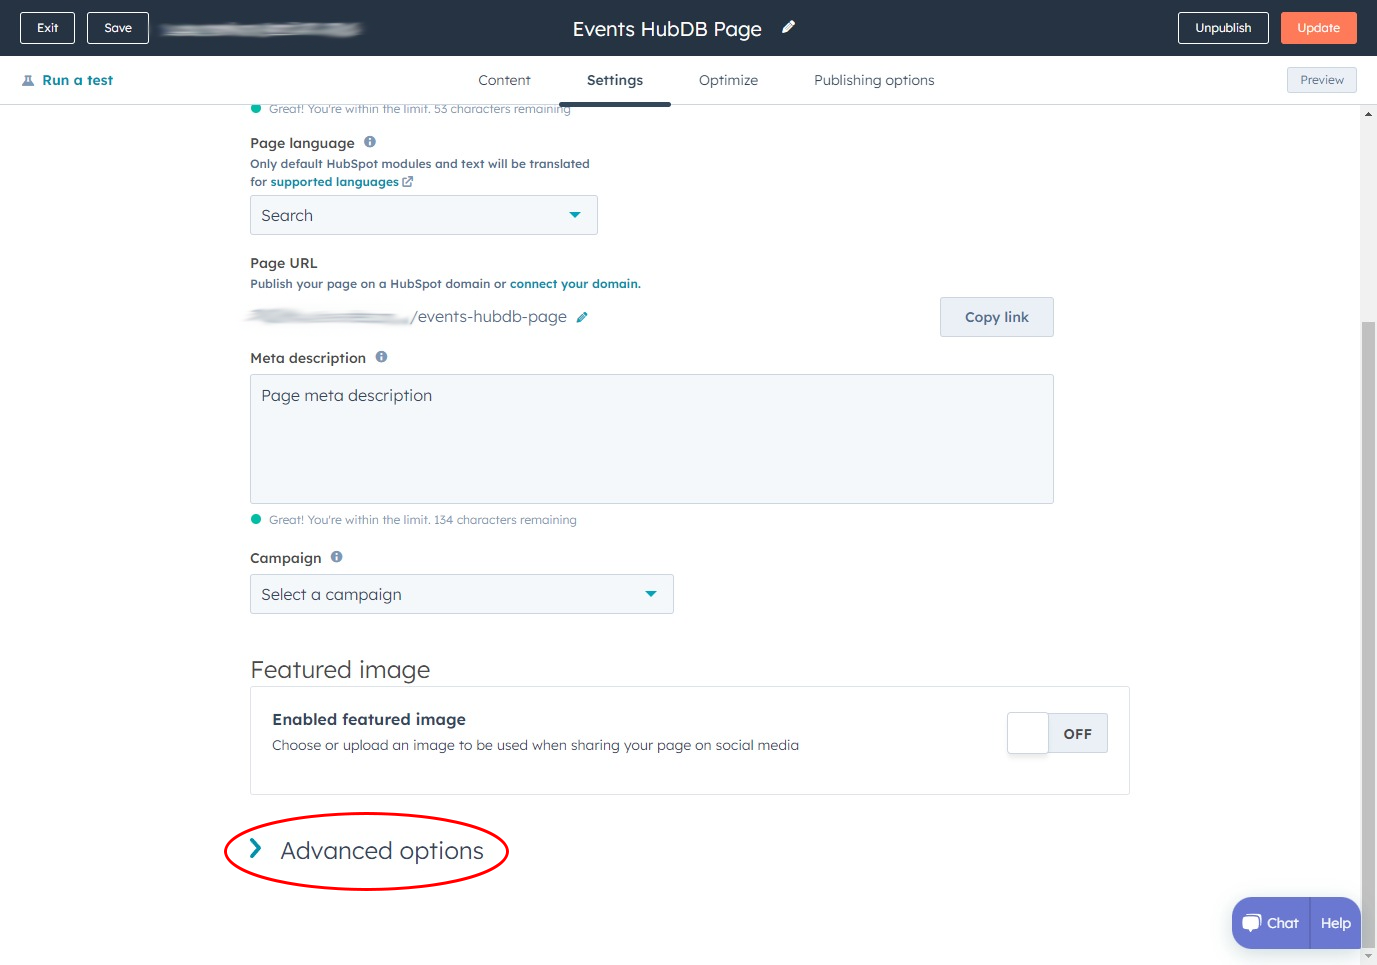
When both the HubDB and Template have been completed, you are ready to create a page that will display your HubDB data. Create the page as a standard Website Page, and be sure to select your new HubDB dynamic template. If you happen to have static page content, you will be able to update it just like any other content on other pages. When editing, the page will display your listing page with the data being pulled from the HubDB. This data will not appear in the Contents tab.
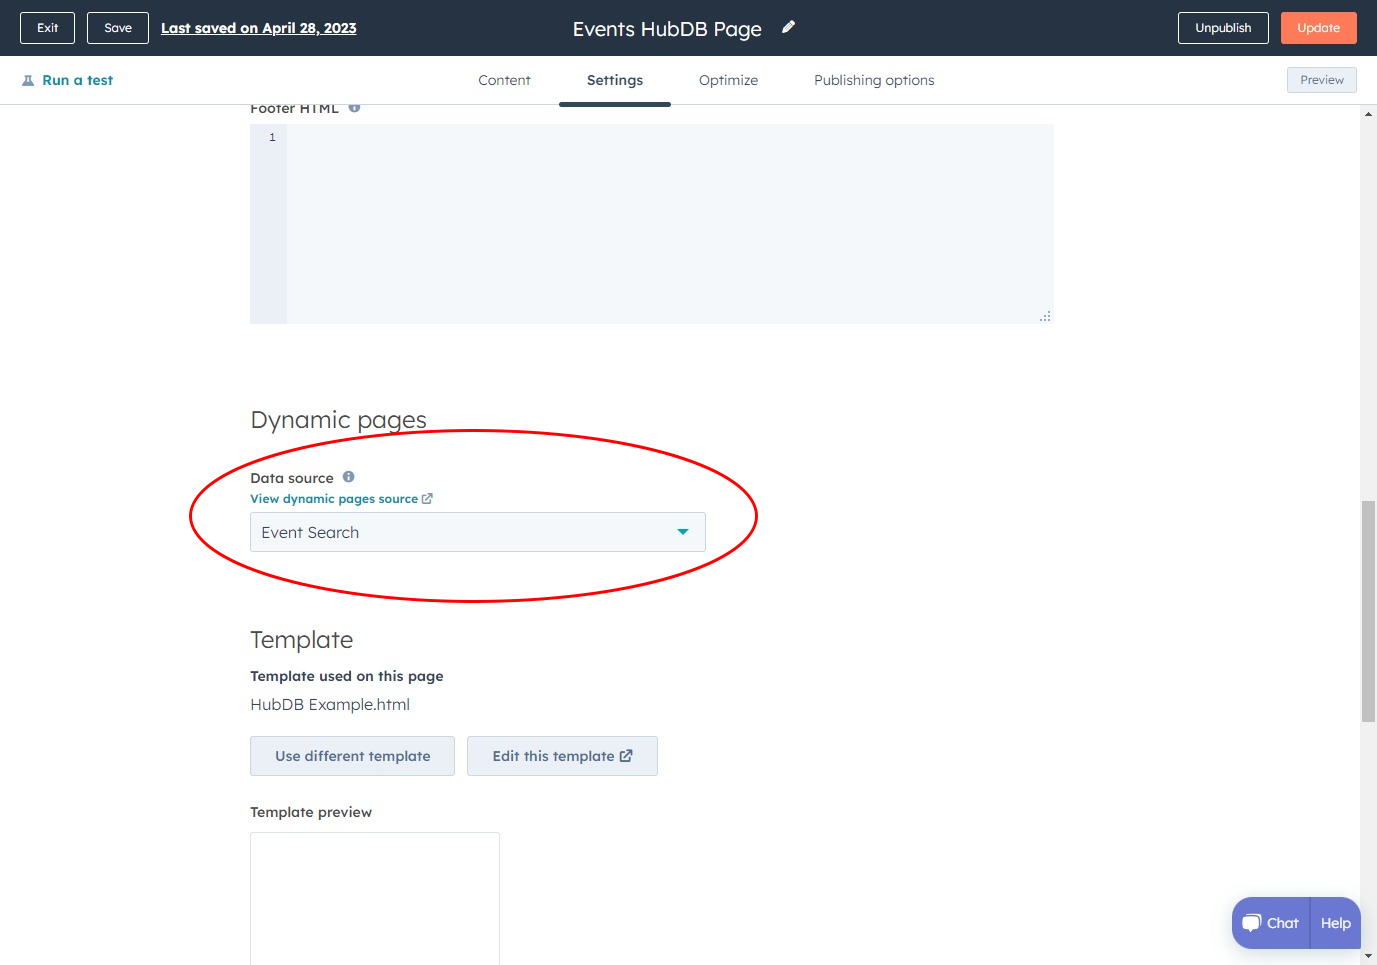
However, there is one more critical detail to make the detail pages work. In the page’s Settings tab, open the Advanced options. Toward the middle of the page, you will find a section labeled Dynamic pages with a drop down. You will need to select the HubDB table. This connects the HubDB to the page and allows HubSpot to create the detail pages.
With this step complete, you are ready to Publish and preview your new page. Remember that any time you make changes to your HubDB, you'll need to click the Publish button in the upper right corner!