If you've done any server-side development, or used one of the multiple CMS platforms available, you know that a custom database can be a powerful tool to use. And HubSpot's HubDB is that flexible database element you have in your HubSpot CMS site. While not without its limitations, it can be a flexible, powerful, time saving tool to use (even with the starter CMS that doesn't support the dynamic CMS page option.)
Why Use a Custom Module
If you’re using either the HubSpot Drag and Drop template designer or developing using the new Theme feature, you are able to use Custom Modules to retrieve and display information from a HubDB. And, even if you are using CMS Hub Professional and Enterprise, there are many instances when it is better to use a module to display the HubDB elements rather than use the dynamic CMS page feature in conjunction with HubDB. You may want the particular HubDB data to appear on a content page with other page content, or may want the HubDB content to appear on various pages or have different data displayed based on the page it’s on. Unless your page is intended to only have content data displayed by the HubDB table (with some exceptions like global content) a custom module is your obvious solution.
Setup and Populate Your HubDB
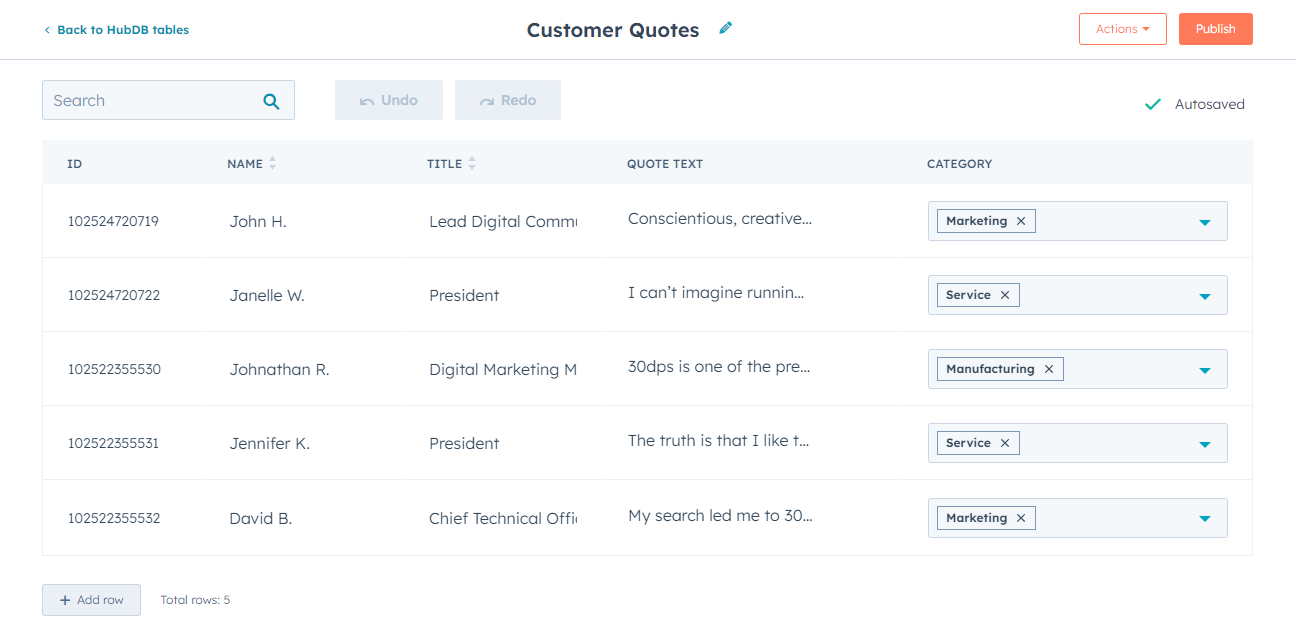
The first step is to create and populate your HubDB table. Even if you don’t have all of your data entered, it’s ideal to have already planned the table out and are ready to create these columns (fields) in your table. Include as much, or a realistic sampling, of your data before creating the module. Be sure to publish the HubDB table so that the latest columns and rows are available to your code.
Custom Module Fields
The latest HubSpot modules have a great deal of support for custom modules, including fields that will allow you to select a table from your HubSpot site, and then select a specific row from a table.
- The HubDB Row field type actually retrieves a row you designate in a table you select. But, this option is also limited to a single row, which may be of limited value for you.
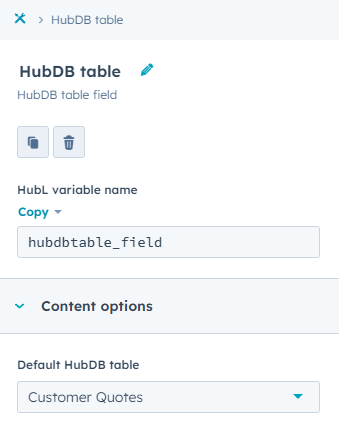
- The HubDB Table field type option only selects a table without designating a row. But, this option will allow you to write code to retrieve rows (either all rows or a subset of rows) from the table you specify.
- A third alternative is to simply hardcode your table’s ID into your module’s code. This has the same effect as making a HubDB Table field with the default value of your table and lock it so the page editor can’t change the value.
HubDB Row Retrieval Implementation
 The easiest implementation is the HubDB Row Implementation. There is no code necessary to retrieve the row of data from the table; the page content editor will allow the editor adding the module to the page to select the table and row they want to display on the page.
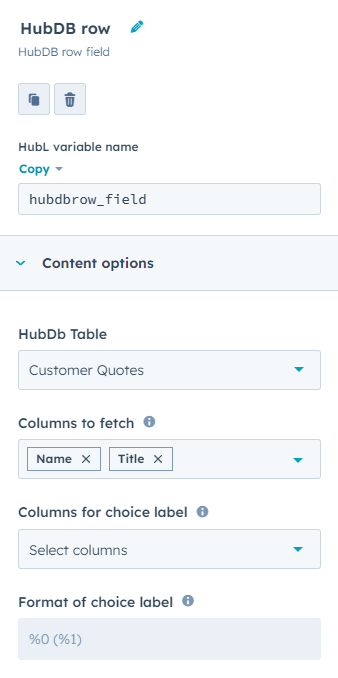
- The HubDB Row Field has a few more configuration fields.
- The Columns to Fetch field allows you to also specify the fields you want returned. Only the fields specified here will be returned for use. If left blank, all of the fields in the row will be returned.
- The Columns for Choice Label specifies the fields you want displayed to the editor when selecting the row to display.
Output a Single HubDB Row
As with other fields, the HubL Variable Name field will be the variable name you use to reference the data retrieved from the HubDB row. It will store a structure with multiple fields associated with the selected HubDB table and row, including the selected row’s columns.
- module.<field name>.table_id - the ID of the selected HubDB table.
- module.<field name>.table_name - the name of the selected HubDB table
- module.<field name>.id - the ID of the selected row in the HubDB table.
- module.<field name>.columns - the data columns of the selected row from the HubDB table. This is the important field you will be using.
To output the data retrieved from your single HubDB row, the syntax is very similar to displaying fields in the HubSpot Custom Module. The data stored in the HubDB row is referenced using the last columns field.
- module.<field name>.columns.<column name>, where the column name is the name of the HubDB column. Only the columns selected in the Columns to Fetch field will be returned. Be aware that if there is no data in the column in the row, the field will not be included in the columns structure.
- module.hubdbrow_field.columns.name will return the column name from the selected row, so:
<div>{{ module.hubdbrow_field.columns.name }}</div>
Will output the data stored in the name column.
If it’s possible that the name field maybe null (or empty) and you don’t want to display the div (or a more complex HTML structure) if the field is empty, wrap the output in an if statement:{% if module.hubdbrow_field.columns.name %}
{{ module.hubdbrow_field.columns.name }}
{% endif %}
Just remember that if you populated the Columns to Fetch field, only that data will be returned. If you reference another field, HubSpot won't necessarily give you an error; it will just treat it as a NULL value.
HubDB Field Retrieval Implementation
 The HubDB Field implementation will only give you the ID of the HubDB table you have selected. You will need to use HubL function hubdb_table_rows (https://developers.hubspot.com/docs/cms/hubl/functions#hubdb-table-rows) to actually retrieve data from the HubDB table.
This function takes two parameters{% set HubDB_Table_Data = hubdb_table_rows(tableId, queryString) %}
- Table ID: the ID of the table you want to pull data from. This can be the field from the HubDB Field variable, or the hardcoded ID of the HubDB table.
- A query: This parameter acts like a URL Query String and gives you several options for managing how much and what data is retrieved from the HubDB table.
- Limit the rows returned: the limit=N parameter will limit the number of rows. So, if you only want 5 rows, use the parameter limit=5. You may only have one limit parameter in the query.
- Ordering rows returned: the orderBy=<field> parameter will allow you to order the rows by the field specified. You may have multiple orderBy fields. HubSpot will sort them in the order they are included in the parameter string.
- By default, it will sort them in ascending order (0->9, A->Z).
- Prefixing the field name with a - sign will flip it into a descending order (9->0, Z->A).
- If you are sorting using a text field, the sorting is not case sensitive. But, if you are sorting numbers stored in a text field, they are stored using string logic (look at the characters going left to right, so 10 would be in front of 2) and not numeric logic.
- There is also a random() option that will randomize the rows. Since HubSpot caches page builds, using the random parameter will not guarantee a random build on every page refresh.
- Filtering rows returned: using the name along with some filtering suffixes, you are able to return only rows in the table to match the specific values you want to display.
<field name>__<filter operator>=<value>. The column name from the HubDB, separated by two underscores, followed by the field operator, followed by an equal sign and the value you want to search for.
We’ll cover some of the more common/useful operators, but the complete set can be found here (https://developers.hubspot.com/docs/api/cms/hubdb#filtering-and-sorting-table-rows)- eq will find an exact match of the value in the column specified.
name__eq=Jim(or the shorthandname=Jim)
will find the exact name Jim in the column name. This is case sensitive. - contains will find a fuzzy match of the value in the column specified. The value doesn’t have to be an exact match, only present in the column’s data. This version is case sensitive. If you want to ignore case, use the operator contains.
name__contains=Johnwill look for John anywhere in the column name.
- lt/lte/gt/gte will match values that are less than (lt)/less than or equal to (lte), greater than (gt)/greater than or equal to (gte) the value. These should only be used on columns that are numbers or dates/datetimes.
order_gte=10will look for any rows with the column order having a value greater than or equal to 10. - is_null/not_null is special; it does not take a value to the right of the equal sign. It will match rows if the data in the column is null (empty) or not null (has a value.)
name__isnull=will return all rows with no value in the column name.
- eq will find an exact match of the value in the column specified.
You will use the & to concatenate multiple items in your query string.name__contains=Jim&limit=10&orderBy=titlewill select the first 10 rows with a name that contains Jim and order the data alphabetically by the title field.
Output Multiple HubDB Rows
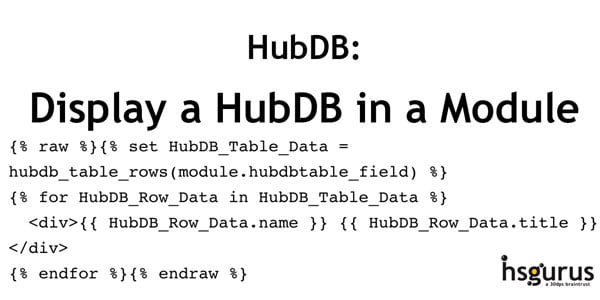
The hubdb_table_rows function works like any other function in HubL; a variable to store the data retrieved belongs on the left side of the equal sign. This variable will store an array of the rows returned by the hubdb_table_rows function, even if you only return a single row. You are able to use a HubL for loop to iterate through the rows and display the retrieved data.{% set HubDB_Table_Data = hubdb_table_rows(module.hubdbtable_field) %}
{% for HubDB_Row_Data in HubDB_Table_Data %}
<div>{{ HubDB_Row_Data.name }} {{ HubDB_Row_Data.title }}</div>
{% endfor %}
General Output Thoughts
The output inside the loop can be as simple or as complex as you want to make it. Most of the fields (like Text and Rich text) are simple outputs using just the variable. However, different column types (images, selects/multi-selects, etc.) may have multiple fields/data in the single column and have a structure of their own in the field. If you want to see a raw dump of the data in the row, remember that HubSpot will output a struct using the expression to output not only a single value, but the structure of a variable with all of its fields. For example:
- Image Type fields
- url
- width
- height
- altText
Simple Example{% set arQuery = hubdb_table_rows(module.hubdbtable_field, 'title__like=Digital&orderBy=random()') %}<div class="customer_quotes">{% for stData in arQuery %}
<div class="quote_item">
{% if stData.image.url %}<div>
<img src="{{ stData.image.url }}" width="{{ stData.image.width }}" height="{{ stData.image.height }}" alt="{{ stData.image.altText }}"/>
</div>{% endif %}
<div>
{{ stData.name }} {{ stData.title }}
</div>
<div>
{{ stData.quote_text }}
</div>
</div>
{% endfor %}
</div>
This will search in the HubDB table designated by the module.hubdbtable_field. It will retrieve all of the rows with Digital in the title field, and return the rows in a random order. The output will include one grouping div for each record. Since the image is considered optional, it's div and output is surrounded by an "if" statement. Another child div surrounds the name and title fields. Finally, another div displays the quote_text field. Obviously, you will want to add css styling to the css of the module to properly style the display of the items on the page for the site visitors.